(Roman Black - 19th Sep 2010)

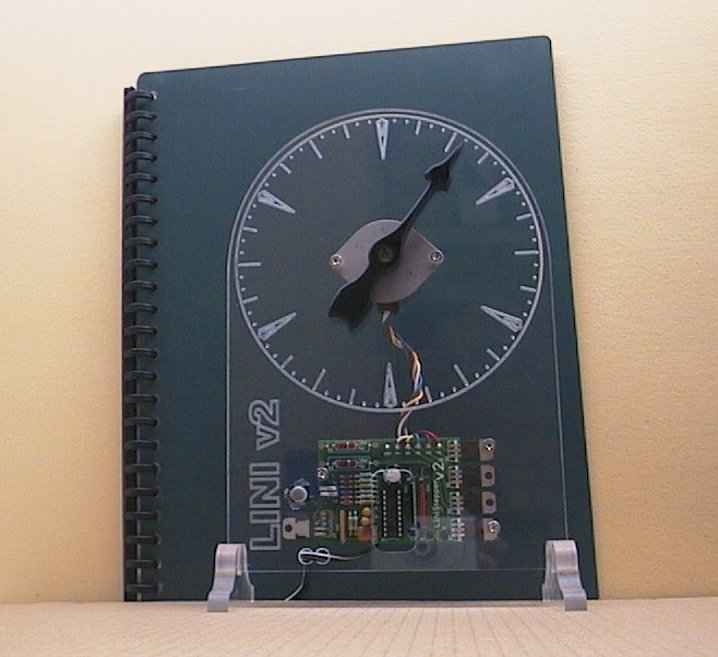
As the LiniStepper stepper motor driver kit has an on-board PIC 16F628A microcontroller that can be used for motion control it can act as a complete 1-hand (artistic? novel?) analogue clock.
Fortunately, the fine microstep resolution of the LiniStepper and its linear smothing caps is quite suitable for a clock hand and gives pretty smooth clock hand rotation unlike other stepper drivers that don't have linear smoothing and would move the hand much "jerkier" around the clock face.
Even better, the LiniStepper is the only stepper driver that uses 18th microsteps, a number that divides by 6, so any clock period in hours or multiples of hours will always divide equally by 6 so will be an exact number of microsteps. This would not occur with typical stepper drivers that use 16th microsteps or 8th microsteps etc.
I have wanted to build a one-hand clock for years, it's not my original idea but one from the very earliest days of clocks when manufacturing was hard and simplicity was prized. So some early clocks only had one hand...
Most one-hand clocks were 12 hours per rotation, but this can be hard to read the time with any amount of accuracy. However using a clock face of 6 hours per rotation makes each hour large enough so that one simple hand gives good timekeeping, in use you can easily see the 5 minute periods and on a large face even 1 minute markings are quite usable.
The 6 hour face has 12 o'clock and 6 o'clock at the TOP, and the face has 6 hours. As you usually know the time to within a 6 hour period this is quite usable, and opens the design to possibility of many nice 6 sided face patterns with a large ornate hand.
I'm not a skilled woodworker or anything so I settled for a simplistic clear clock face made from 1/4" acrylic and an almost fancy black hand made from 3/8" black acrylic.
The LiniStepper was placed visibly behind the clear face (just below) as it acts as the whole clock brain and motor driver and gives the clock some "geek cred" as a conversation piece.
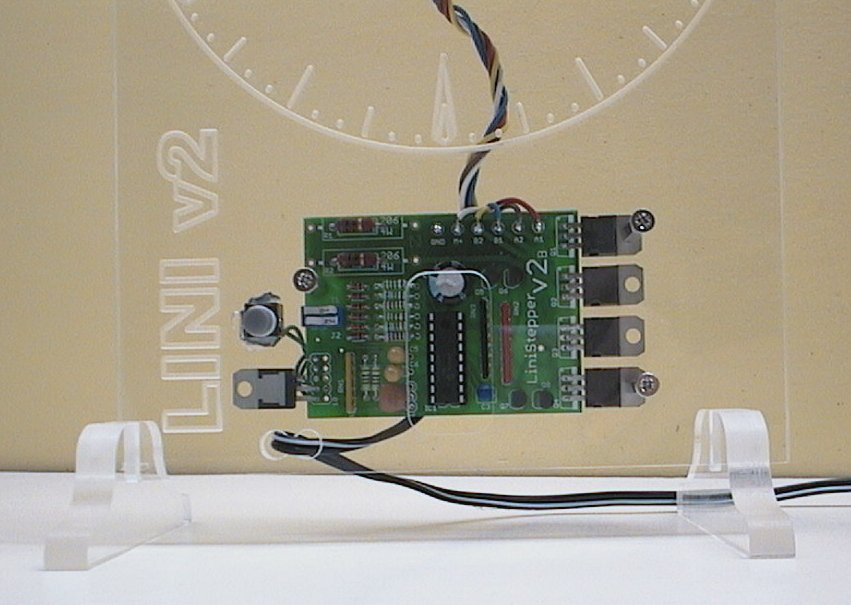
(Brains on display for maximum geekiness)
The face included a cutout so the PIC can easily be removed and reprogrammed, this is for when I get bored and want to add fun features later like making the clock hand "dance" around at odd times or something like that. Like I said, this version is a geek clock although it would be just as easy to make a beautiful ornate one hand clock instead.
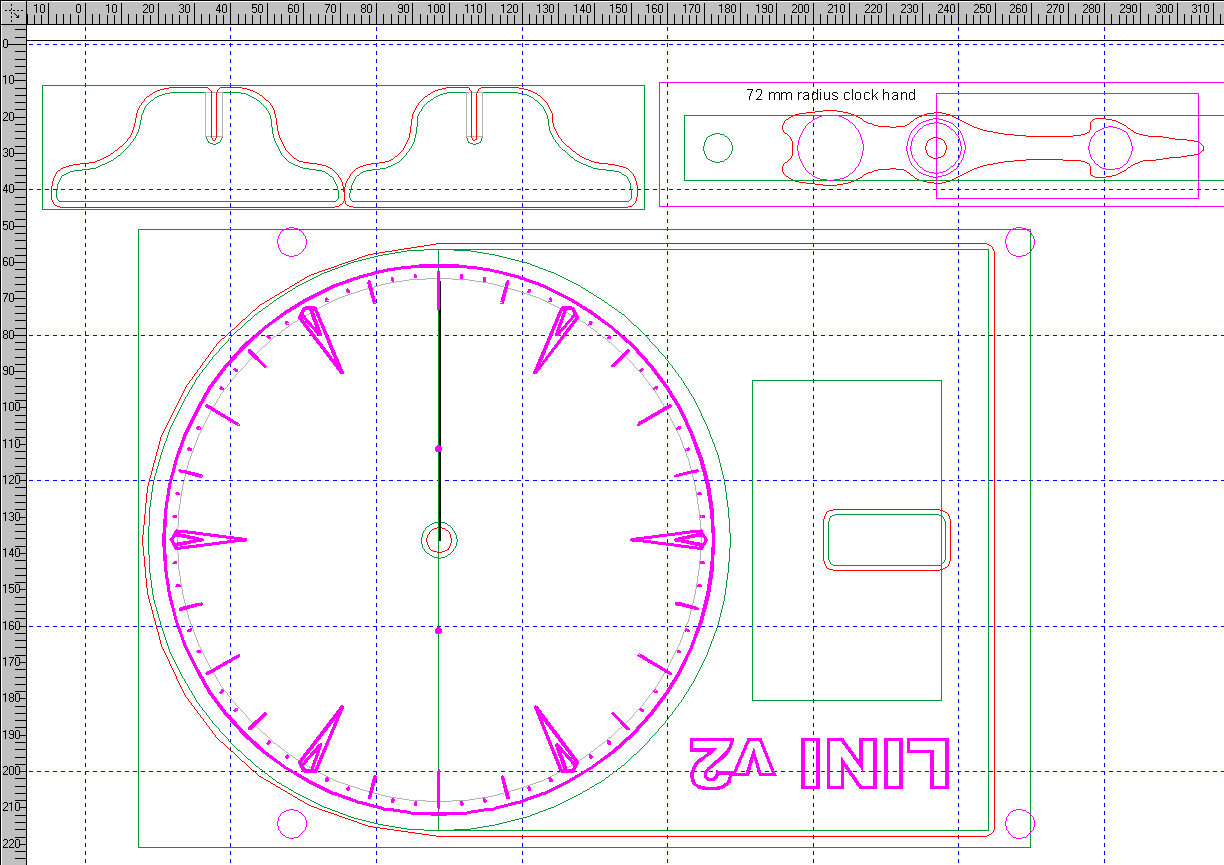
Here is the screen shot from the cad design of the clock parts, you could trace it in your can program if there are any parts there you want to use;
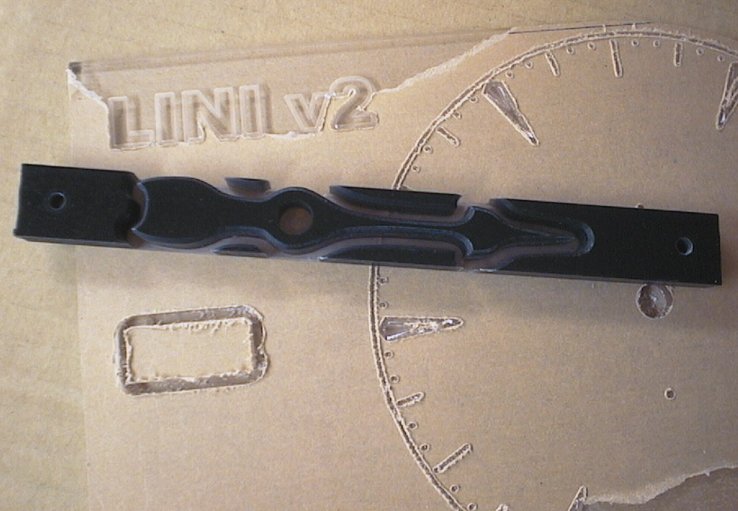
Here is a photo of the hand and face after cutting on the CNC router (waiting to peel off the brown papaer);
The hand should ideally be balanced, this allows the stepper motor to use very low operating current and reduces any "bias" to the time caused by gravity pulling on the hand.
The hand was a pressfit onto the small brass stepper cog, which was about 9mm in diameter.
I adapted the original open-source LiniStepper v2 code, which is in PIC assembler for 16F628A. The LiniClock source code is also open-source and is supplied on the link below.
To make the code usable for most people it has a number of options;
The clock will work better with the 200step/rev motor as the hand will move in much finer and smoother increments, but these motors are more expensive. The cheap and small 48step/rev motors as found in all cheap bubblejet printers are not good for much as they are quite weak, however they are perfectly acceptable as a clock so finally you can do something useful with those tiny pancake motors in your junkbox.
Dipswitch J1 selects the motor type.
Dipswitch J2 selects whether the clock runs from the onboard 16MHz xtal or
from an external 50/60Hz mains frequency signal.
In most countries the mains grid is very accuractely controlled so using the mains freq as the clock source will give a superbly accurate clock that never gains or loses time. Just connect 12 volts AC to the pin RA1 or RA2 through a 4k7 resistor, the 12 volts AC can be provided from either ~ pin on the 12v bridge rectifier.
60Hz mains freq- connect to RA1
50Hz mains freq- connect to RA2 (LiniClock will autodetect)
Source code LiniClock_6hour.asm for a 6hour rotating clock
Source code LiniClock_12hour.asm for a 12hour rotating clock
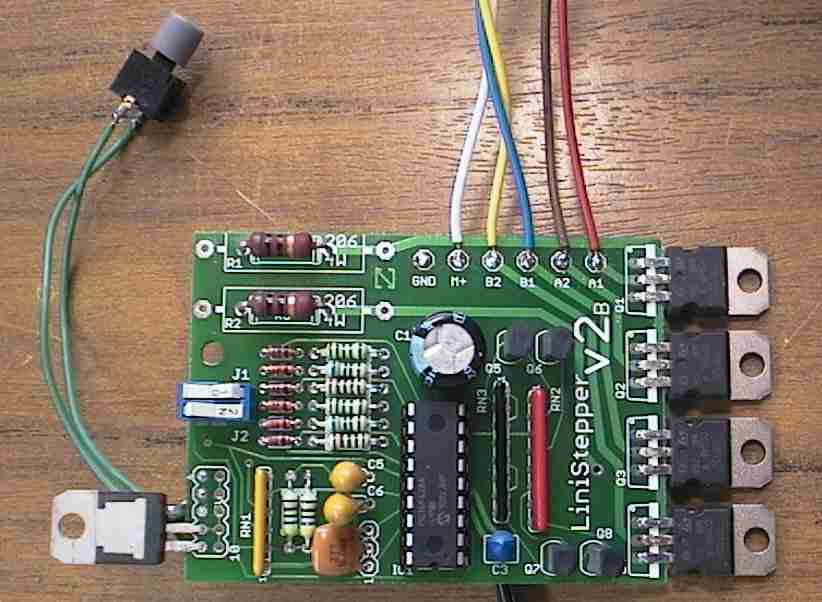
This was pretty easy. I just soldered up the LiniStepper v2 kit as per its instructions, with a few minor changes;
Here is the front of the PCB;
And on the rear you can see the little round bridge rectifier, this converts the 12 volts AC to about 15 volts DC for the LiniStepper motor. The yellow wire connects the 12 volts AC through a 4k7 resistor to the RA2 pin, this is the 50Hz mains freq detect pin.
A simple 7805 voltage regulator is soldered to the Gnd and +5v pins, and its input it connected to the +15v DC through the red wire.
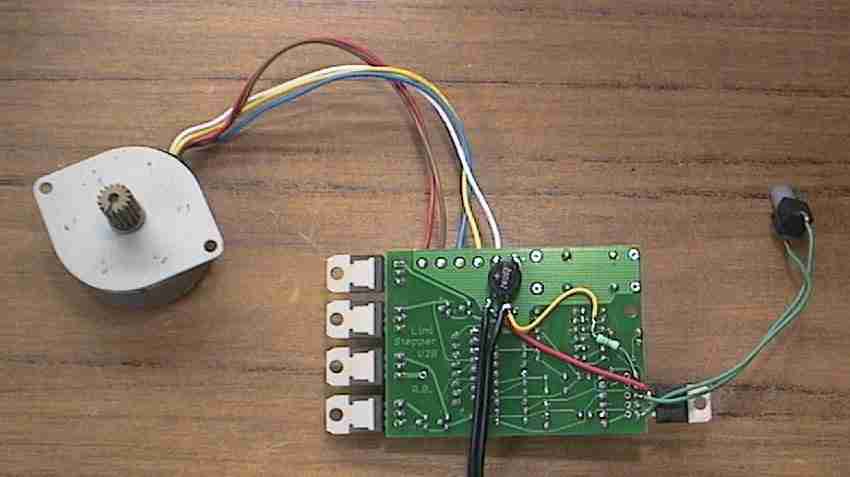
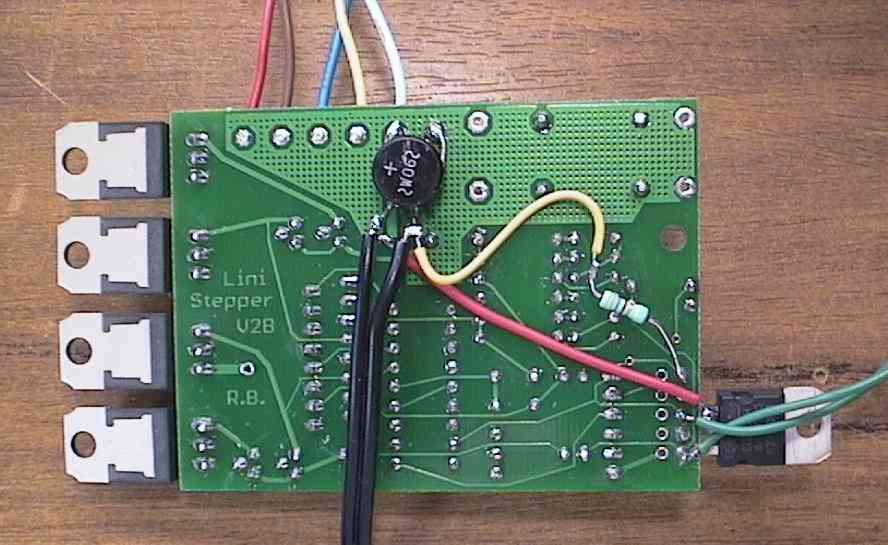
The black wires connect to the 12 volt AC plugpack (wall-wart) so everything is run from a safe low-voltage 12 volts AC.
Setting the LiniClock
To set the clock I just turned the hand (by hand haha) until it was just before the proper time. Then pressed the little grey "clock set" button, this turns the hand forward slowly until it is at the correct time, then the button released. It's that simple.
Since I used the 50Hz mains freq sync option the clock will never gain or lose time (as the Australian 50Hz mains freq is very accurate).
It has kept perfect time so far, and my only problem is that sometimes the hand can be seen making a small movement because the motor is just a cheap 48step/rev type and the microsteps are fairly "large" in comparison. I think with a better motor (like a 200step/rev motor) the movement would be imperceptable, especially with large values for the smoothing caps C5 and C6.
The motor gets warm in use, but at 100mA and 15v supply the four LiniStepper transistors barely get warm and don't need a heatsink.
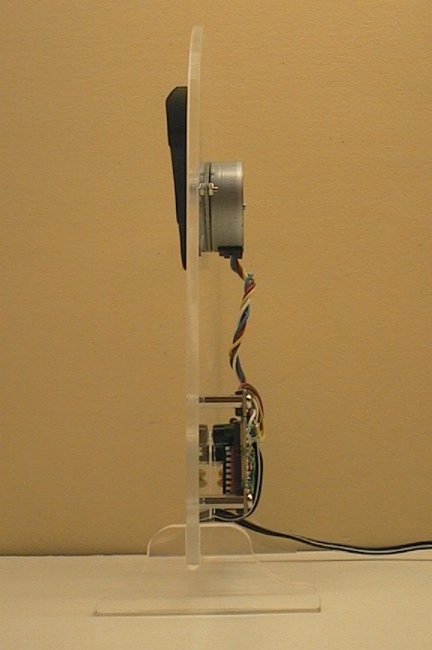
The clock is slim and simplistic, and in my mind looks good.
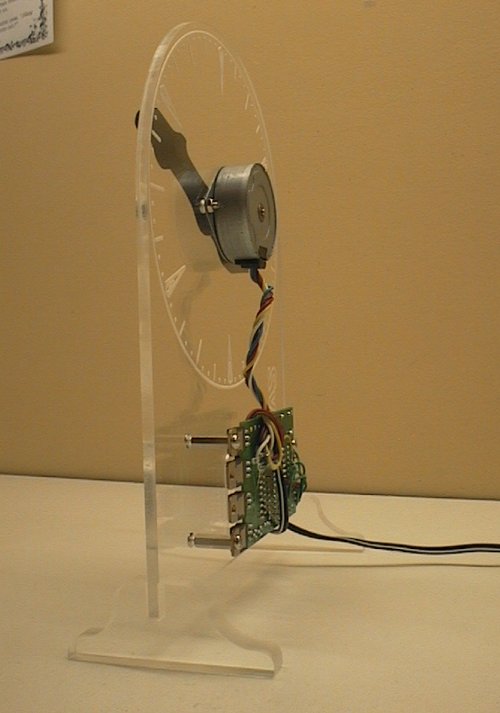
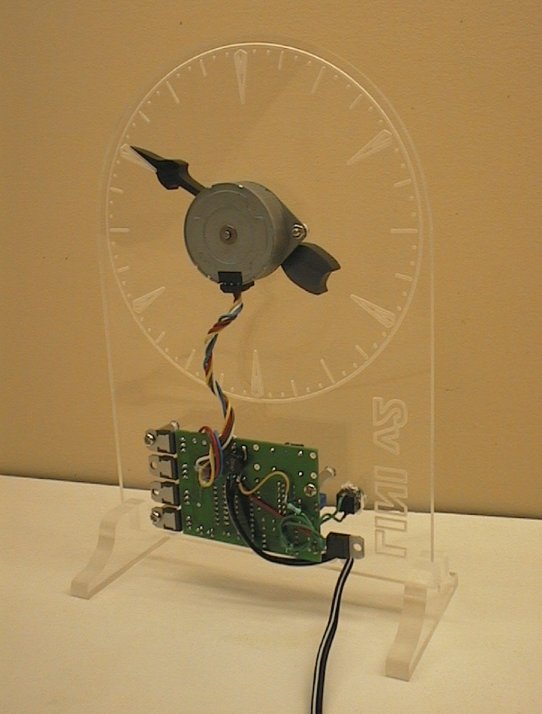
A couple of spots of hot-melt glue hold the wires in place on the rear of the PCB.

Saying; "6:35 and all's well!" (end)
| file: /Techref/io/stepper/linistep/LiniClock/index.htm, 8KB, , updated: 2010/10/11 14:40, local time: 2025/10/15 20:43,
216.73.216.155,10-3-165-151:LOG IN
|
| ©2025 These pages are served without commercial sponsorship. (No popup ads, etc...).Bandwidth abuse increases hosting cost forcing sponsorship or shutdown. This server aggressively defends against automated copying for any reason including offline viewing, duplication, etc... Please respect this requirement and DO NOT RIP THIS SITE. Questions? <A HREF="http://ecomorder.com/Techref/io/stepper/linistep/LiniClock/index.htm"> Accurate analogue clock using a Linistepper v2</A> |
| Did you find what you needed? |
Welcome to ecomorder.com! |
Welcome to ecomorder.com! |
.